Sometimes cravings can be expensive. If you are a fan of lattes, buying an espresso machine or constantly ordering in coffee shops can strain your budget.
Good thing you can still satisfy your cravings by making steamed milk by yourself. Read through this short article to know more.
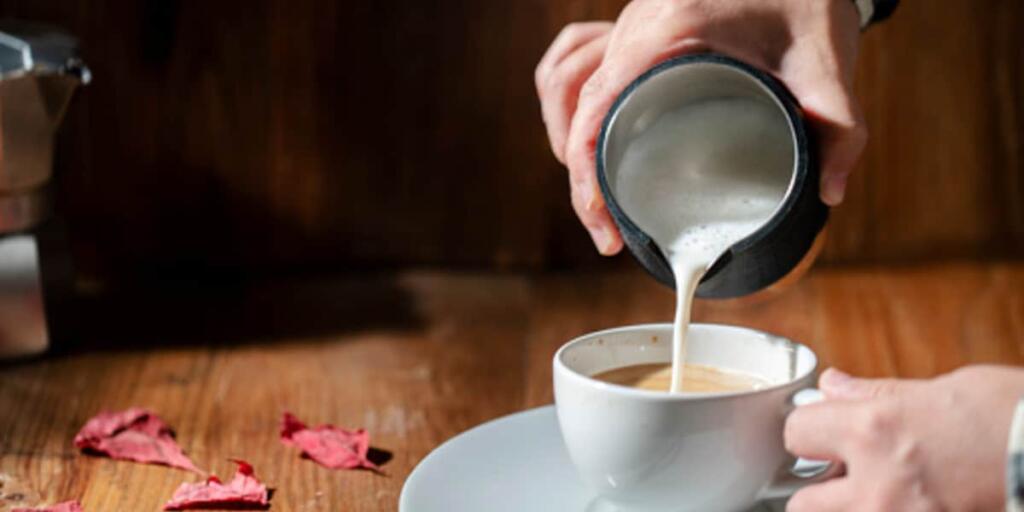
The difference between frothing and steaming
One thing to easily differentiate these two is by looking at the bubbles they form. Frothed milk has large air bubbles, which seem like a fluffy foam at the top of the milk.
On the other hand, steamed milk has small bubbles, also called microfoam, incorporated into it. It has a rich and creamy texture because air is pulled into the milk while heated.
What kind of milk should you use?
The kind of milk you will use depends on whether you want a microfoam or a frothy texture. If you have lactose intolerance, you can go for dairy-free alternatives such as soy, coconut, almond, and rice milk.
If you can drink dairy products, you can go with whole milk, organic milk, non-fat milk, and 2% drink for your latte.
For best microfoam
If you want the best texture, use fresh and cold milk, preferably the latest you can buy. Doing so will ensure you can get the best microfoam. As much as possible, refrain from buying milk that approaches its best-by-date.
Purchase only what you can instantly use. Same with other goods such as coffee beans, it is never a good idea to store a lot and use it after a few weeks or months as the quality will never be the same.
For frothy and stiff bubbles
If you like a lot of froth and stiff bubbles in your milk, you may use skim milk or 2% milk. Because of its high protein content, bubbles are created, which retain air. If you love extra sweetness, this is also the best choice for you, as skim milk has a high sugar percentage.
For a thick and creamy consistency
If you love a creamy texture with a little bit of microfoam layer at the top, whole milk is the best choice for you. It has extra butter fat, which gives it a thicker consistency.
If you don’t like dairy milk, another option for a creamy texture is coconut milk because of its high-fat content with a hint of tropical flavor.
A quick guide on how to steam milk at home

Using the stovetop
When using this method, you can directly place the thermometer in the pot, thus, giving you more control over the temperature. Here are the steps when using the stovetop to make steamed milk:
- Place the milk in the container for heating. Add enough because the less milk you put, the more stirring it requires to prevent scalding.
- If you struggle with scalding, use a double boiler. One larger pot with half water on a gentle boil. The other pot with milk on top, and stir until it reaches 150F.
- Set the stove on low-medium to avoid milk scalding and burning.
- Gently stir the milk until it reaches 150F. It may take two to three minutes, depending on whether you use gas or electricity.
- Remove the steamed milk and add it to your freshly brewed coffee.
Using a microwave
If you are not yet an expert in determining the proper time for heating milk, the safest choice is to use a thermometer. The ideal temperature for the milk is 150F. Then follow these steps.
- Put the desired amount of milk in a microwave-safe container. Use around ¼ cup if you will utilize a frother.
- If you place less than ½ cup of milk, heat it for 20-30 seconds. Make it 30-45 seconds if you use around ½ to 1 cup.
- Use the thermometer to monitor the milk’s temperature. If it exceeds 150F, reduce the time by 10 seconds the next time you repeat the process. If it is less than 150F, add another 10 seconds.
- Pour the steamed milk into the freshly brewed coffee. If you want a foamy texture, you may use an immersion blender or a milk frother.
Using a mason jar
If you do not have an immersion blender or a milk frother at home, you can use this method. You also do not need a lot of utensils like pots, bowls, and cups in this method, so it will save you time from washing this.
You only need to have a microwave and a mason jar with a cover and ring, and then with this you can heat and froth the milk. Here are the steps:
- Pour ¼ cup of milk into a big mason jar. Do not cover it yet.
- You need to heat the milk in less than or more than 20 to 30 seconds, depending on the kind of microwave you have at home.
- Use the kitchen thermometer to check if the temperature has already reached 150F.
- Once the desired temperature is reached, remove the milk from the microwave and cover it.
- Froth the milk by shaking it until it doubles in volume.
- Pour your milk into your freshly brewed coffee, and you’re done!
Using a French press
- Put milk into a French press coffee maker at 150 to 155 F.
- The milk level should be greater than the steel filter at its lowest part.
- Create air bubbles by quickly pumping the plunger up and down.
- Put the milk into your coffee. You may pour it directly or use a spoon.
Using a saucepan and balloon whisk
- Put a sufficient amount of milk in a small saucepan.
- Place the said saucepan on the stove.
- Set the stove on low-medium heat.
- Once the milk starts to warm, use a balloon whisk to beat it fast.
- If you do not have a balloon whisk, you may use a hand mixer, but it can be messy.
Reminders when making steamed milk
Even though the whole DIY process is simple, doing it at first can be a challenging task. Here are some reminders to refrain from making beginner’s mistakes.
Create a whirlpool
If you manage to create a whirlpool, that is an indicator that you are mixing it properly and that it will give you a creamy texture afterward.
Do not wait for too long after steaming.
Do not dawdle after you remove the milk from its steamer. Continue the process right away so that the foam will not be separated from the milk.
Do not overheat the milk.
Getting the right temperature for steamed milk is essential; for beginners, a thermometer is required. If it gets too hot, protein molecules in the milk will break down and will destroy the milk’s flavor and bubbles.
Do not pull air for too long or too late.
One indicator that you are pulling air too long is that you hear a screeching sound from the milk. This will then cause the appearance of large bubbles, messing up your foam. Remember that pulling air into the milk only happens within seconds.
The opposite of this one is pulling air too late. If you do not make foam as soon as the milk starts to warm, it will be difficult to do it afterward.
FAQs
Will steaming milk affect its sweetness?
On the other hand, overheating will also lead to scorched milk. Stick to the desired temperature if you want to improve the milk’s sweetness.
What is the right temperature for steamed milk?
That is why measuring it with a thermometer is recommended. You may also listen to the sound. Once it starts to sound like tearing paper, that means the milk is steaming.
Conclusion
You do not have to spend a lot and buy expensive equipment to steam milk. You can make use of the kitchen equipment found at home and follow these steps. Just be mindful of the temperature because anything less or more than it can negatively impact your milk’s foaming and taste.
Disclaimer: This post contains affiliate links, which means I may receive a small commission, at no extra cost to you, if you make a purchase using these links. Remember to support us by purchasing through the Amazon/Walmart/Impact Radius links provided. Last update on 2024-04-30 / Affiliate links / Images from Amazon Product Advertising API
Disclosure: No compensation or free products were received in exchange for writing this review.

Editorial Staff
The editorial staff at Crazy Coffee Crave is a team of coffee enthusiasts & Baristas who enjoy the one thing we all think about as soon as we get up in the morning. Trusted by thousands of readers worldwide.